Monday, August 13, 2007

Carrot Mushroom Fusilli

Just around 6pm, I feel so hungry. And the temptation to pick up the phone and order a take away is enormous. And that means my carefully planned dinner is put in to the refrigerator for tomorrow. I almost succumbed. And then I remembered a line from Everbody likes Sandwiches:

Just thinking about dinner — let alone getting up the energy to make it happen seemed like too damn much. But being the frugal girl that I am, I didn't want to order in take-out…Instead, I did what most modern cooks do. I went online to
epicurious and typed in a couple things I had in my fridge and out popped a couple super simple recipes.

I did not go onto epicurious. Instead I looked in my fridge and kitchen and cooked up an easy dish with what I found.

Here is what I found:

1 small carrot
half a cube of Amul cheese
Dried mushrooms – a handful
Fusilli – a handful
Garlic – 3 cloves
Salt, pepper and dried rosemary
Olive oil

This is what I did:

Put the dried mushroom in a pan of water and let it simmer for 20 minutes while I watered the plants on my balcony. I also pruned some of them, in case you are wondering that my balcony must either be enormous or I must be having a veritable hanging garden. Neither. B
y the time I had finished with the plants, the mushrooms were tender. I drained them.
Next I put a pan of water to boil for the fusilli.
Then I scraped the carrot and washed it. And then using the peeler, I got really fine strips of carrot.
I chopped the garlic finely.
I grated the half cube of cheese.
I put a little olive oil into the frying pan and added the garlic.
As soon as it started to brown, I added the carrot strips and mushrooms.
Sprinkled some salt, paprika and dried rosemary.
Then I added the drained pasta and mixed well.
Lastly, I sprinked the grated cheese on top, turned off the flame and covered the pan and let it sit for couple of minutes.

The dish really looked good. The beige of the mushroom nicely contrasting with the orange of the carrots. (Alas no photos). And then, I ate it all up.

Upshot of this: The small quantity served as an appetizer and now I am really hungry and not really looking forward to the homely dinner. Eeeps!

Sunday, August 05, 2007

My very own Yogurt dessert

Have come up with my very OWN recipe. Yes its quick, its ludicrously easy, and its only yogurt. But I did it myself. Yahoo... Dear readers, you must be wondering at this point that I must be either completely nuts or egotistical. Neither really. I have this idea deep within me, that I am not much of a cook. And have never really tried very hard to overcome that bias deep within me. I make elaborate preparations but lose steam mid way. I have huge compilations of recipes collected from all over. But can never seem to find them. On the rare occasion that I cook for anyone other than A, I get R to make up a simple do-able menu for me. There were three other dishes that I cooked along with this yogurt dessert. Those I leave for another time.

First, as the name suggests, you will need yogurt. Millions do it on a daily basis through out India and elsewhere. But the problem was, that I was not among them. My cook would do that for me. And today, she had left by the time the milk arrived (rather late in the day). I tried to look it up on the web..and the two links I found (both american) mentioned using a thermometer to check the temperature of the milk etc. Now, that is not something I have seen my mother, or mother-in-law or my maid do. I knew the basics, so I thought I'd give it a shot. Without a thermometer that is.


You will need:
Milk 250 ml (I used double toned milk)
Sugar 1tsp
Vanilla essence
Yogurt to seed
Pistachio nuts: 5-6 coarsely chopped
Honey

How to

  1. Heat the milk. Add 1 tsp of sugar to the milk. Remove from fire when it boils. Let the milk cool to room temperature.
  2. Add 1/2 to 1 tsp of yogurt to seed, in the pan you are going pour the milk into. I was going to have a guest for dinner. So, I poured the milk into three small terracotta jars (the size of a small teacup).
  3. Add 1-2 drops of vanilla essence in each of the jars. Cover with foil and set aside (inside a microwaver or like I did, on top of the refrigerator).
  4. Once the yogurt sets, put it in the fridge for chilling. The yogurt set in about 4 hours time (It might take longer if the weather is cold).
  5. Just before serving, add the crushed pistachio nuts, and sprinkle honey on top.

PS - There must be a similar recipe for this; But I came up with this myself. And that, has to be an event and a rare one at that.

PS2 - Dear R, Have I made the grade then?

Saturday, August 04, 2007

Lau Ghonto: My short cut

Lau or Lauki is a summer staple for us bongs. For others too since the markets and mandis seem to be flooded with it. Tired of making the same old dal-lauki dish, I got a bit adventorous and tried "Lau Ghonto", from my bible to bengali cooking: "Baro mashey tero pod" (Thirteen courses for twelve months" written by some one's great grandmother.


You will need:
Lauki: 1 (The one I had was about a foot long)
Daler bori: 5-6 (Lentil dumplings)
Cumin grains: 1 tsp
Bay leaf: 2
Green Chillie: 2
Coconut flakes: Half a coconut
Kabuli Chana: These are the small dark variety, soaked the night before
Milk: 1/2 cup
Atta: 2 tsp
Salt to taste
Sugar: 1/4 tsp or less

How to or really what I did:

1. Peel the lauki and wash the gourd well.
2. Slice finely
3. Grate the cocounut
4. The kabuli chanas should be soaked the night before, but hey, I already had some
boiled ones left over in the fridge. Boiled channey stay well and are a handy
addition to salads.
5. Heat 1 tbsp oil to smoking in a kadai / wok.
6. Add the boris and stir. They will brown in a few seconds. Take them out and keep.
7. Add the cumin grains and bay leaf to the remaining oil in the kadai.
8. When the cumin grains start popping (which almost immediately), add the sliced
lauki.
9. Add salt (about 1 tsp)
10. Add the sliced chillie. This is optional, but chillie does give a very nice flavour.
11. Add half cup water.
12. Cover, lower flame.
13. The lauki should be cooked (softened) in about 5 minutes. But it would still
remain watery.
14. Sprinkle some sugar...just a few grains really, add the grated cocounut and the
kabuli chana.
15. The water will dry up in a few more minutes.
16. While waiting for the water to dry up, stir 1 tsp of atta in the milk so that
there are no lumps.
17. Add it to the lauki.
18. Stir well and remove from flame.
19. Keep the lid on for a while, so that the milk is soaked well into the lauki.
20. Use a pestle to lightly grind the boris.
21. Sprinkle them evenly over the lauki and serve!
22. Best eaten with, as all things bengali, rice.

PS - So what was my shortcut? I didnt have coconut. And so I left it out. Tasted quite nice without it.

Monday, June 25, 2007

Panicked Paneer

We returned home yesterday to a near empty refrigerator and hungry stomachs. It was simply too hot to go out for dinner, so I asked A to get some paneer. It was almost 8pm when I ventured into the kitchen to find that I was left with a motley bunch of ingredients. I made a mish mash of the various paneer recipes I knew to come up with this:

Ingredients or what I started with
So, at random, I chopped 2 onions.
2 small capsicum / Shimla Mirch cut into sqares (like in chinese dishes)
Eeks. Out of garlic...completely
One potato cubed (that's all that was there)
Paneer 200gms
Panch phoron (bengali 5 spice)
Jeera powder / Cumin 1/2 tsp
Coriander powder 1 & 1/2 tsp
turmeric powder 1/2 tsp
Oil
Salt

Here is how I did it:
1. I heat 2 tbsp oil in a kadai
2. Added panch phoron. Panicked as I was, I forgot the 5 spice combination and made up one of my own (jeera / kalonji / methi / anise / ajwain instead of the mustard).
3. Added powdered jeera, dhania and turmeric to the oil and fried well with a little bit of water. (When the water dries up, repeat the process couple of times so that the masalas are well cooked).
4. Then I added the cubed potato (I had to cube really fine since all I had was one aloo), stirred well. Added a cup of water, salt, covered and lowered flame to cook till potato were softened.
5. Egad. I had to fry the onions in the oil first. Which I didn't. Never mind.
6. In between, I managed to heat some water with a little bit of salt. When it started boiling, I removed it from flame and add the paneer to it, cubed (so that it could soak up the salt).
7. In another pan, I heated 2 tbsp oil, fried the diced onions and capsicum. Then I drained the paneer and added it to the pan. Till it was lightly fried.
8. In the meanwhile, in my other kadai, the potatoes had softened. I put another half cup of water in to make some gravy, adjusted the salt, let it come to a boil. 9.Then I added the onion/capsicum/paneer fry to the gravy.
10.Added half tsp grated ginger. Covered it and let it cook over low flame for a few minutes.
11. Adjusted seasoning and then served with chapatis (which thankfully came out fine).

And what do you know...it was nice. A asked for second helpings and we finished all of it. Phew.

Umm, so, the lesson I learnt was:
It is not the recipe which is important (it is, but not overtly so, atleast when u are cooking at home and in a rush), but keeping a cool head while all about you is hot (the weather -- it was so humid and hot...I had difficulty in keeping the sweat trickling down everywhere, but mostly into my eyes) is equally important while cooking!

Tuesday, June 19, 2007

Bok-Phul Bhaja

After the terrible heat wave when temperatures went up to 47 degrees and continuously for nearly a week, we have had the blessed rains and how. This weekend was so wonderful, waking upto overcast skies. Rain mean kichudi and lots of fries (vegetarian and non vegetarian). This would include: fried parwal, fried brinjal, fried fish and "bok phul bhaja". Oh god, how long has it been since I have eaten some bok phul bhaja. I was about to pen down my recipe (the way it is cooked at home, and infact pretty much the way its cooked, or should I say deep fried!) when I found this nifty recipe already up at Senskitchen. So, do follow the link for the recipe.

Bok phul, looks like this and its scientific name is (had to search for that)is Sesbania grandiflora Leguminosae!

I thought we were alone in eating bok-phul ,(we as in bengalis). But apparanently, not so. Accroding to a FAO , in Vietnam, Sesbania grandiflora (Leguminosae) form a delicious ingredient in the very popular local sour soup called canh chua.

More pictures and description on this page.

Monday, June 18, 2007

Mimi's Veg Macaroni

Another recipe from R. The comments too are hers.

Its funny how friendships develop often over recipe swaps or over kitchen news. It was a bit like that with Mimi. Although we had known each other from before, we began talking about food and then friendship simply followed.

I learnt three very basic recipes from her and am writing as I remember them. I first sampled each from mimi's reserve of recipes. Then I tried them out and only then did I write them down in my dog eared very pathetic looking old recipe diary.
I do hope that I have kept it close to what was said by Mimi in the first place---she was good at anything she did and though she had turned vegetarian after joining IISCKON, she always had a non veg recipe, ready on her lips -- as fresh as if she ate them the day before.. As I write this, many memories of her are flashing by--so its really an ode to her, for she left us all in 2003 August 25th. Here is the first of those recipes:-

Mimi's Vegetarian macaroni

You will need:
2 pkts of macaroni boiled with salt water and dried under fan and slightly smeared with oil after cooling
1/2 cup prefried tiny cauliflower florets
1/4 tsp hing or asoefetida
1/2 cup Capsicum cut into small squares
1/2 cup carrot cut into small squares
1/2 cup beans julienned or diced
1/2 cup peas
3 tomatoes cut into very small pieces and pureed

How to:

Put keep 2tsp soyasauce,3 tsp vinegar, 3-4 green chillies cut into small pieces in a pot with a lid.

Add 3-4 tbsp oil to a pan. Throw in carrot, beans, peas and hing.
Add a bit of salt, according to taste. Cover the pan and allow the veggies to soften.
Do remember to stir the veggies a few times, though.
When the veggies are a bit soft, add capsicum. Add the tomato puree.
When puree starts to dry add soya sauce mixture,sugar and finally the prefried cauliflower. Set aside.

In a pan add 2 tbsp oil,add the macaroni and fry. Add the vegetable mixture to the macaroni and stir for three to four minutes. Mix well and remove from fire.

Enjoy!

Sunday, June 17, 2007

Merguez Meal

Just the other day, we were reminscing about France. What do we miss about it? Food mostly. "Cheese", I said. "Merguez" said A. We first tasted this spicy north african sausage in France. With Couscous Royale.

Later on, I was brave enough to pick up some from the super marche and make my own dish. Rather simple it was (but sometimes, simple is best) and ofcourse, the Merguez did its own trick and the dish was marvellous. Definitely not gourmet, but damn good nevertheless.

You will need:
6 merguez (2 for me, 4 for A)
1 large or 2 small capsicum / green bell pepper
2 large tomatoes (smaller if you prefer less tart)
2 large onions

(That's it). No salt, no oil. Just a frying pan. And remember to keep the windows open and an exhaust fan switched on, if you do have one in your kitchen.

How to:
1. Put a frying pan (large enough to hold 6 long merguez) on high flame.

2. When the pan's heated up, put the merguez in.

3. Within a minute of so, the fat from the merguez will start oozing out.

Roll them over so that they are evenly fried, in thier own fat!!

4. Add the onions, tomatoes and bell pepper (all together, order doesn't matter).

5. Keep rolling the merguez to get them evenly fried (in their own fat).

6. When they are done, put them on the dish and eat!!

The fat from the merguez gives a lovely flavour to the onions / pepper / tomatoes.

Its a wonder that something so simple could taste so GOOD!!

Well, do try it...out, while I go and wipe the drool of my keyboard! (Just kidding).

Oh yes, ofcourse, to be eaten with bread of your choice.

Saturday, June 16, 2007

What's Cooking elsewhere

Its been nearly an year since I have posted anything on Timid Cook.

1. I have been extremely busy to put it mildy.

2. Have found one after the other, two good cooks (thankgod) (one replaced the other)

3. Been plain lazy.

Ergo, no posts.

Our PC went down to a virus attack and had to undergo major surgery. As a result, lost all my bookmarks. This is good and bad. Bad, because had a great list of food blogs. Good because I can now look for and discover new blogs.

I was surfing with a plate of plain dal-chawal-ghar-ka-khana balanced precariously on my lap, eating with my right hand and handling the mouse with my left, when I came across Tandoori-Turkey-Kabob.

Mind boggles at the fusion-i-fication.

Mutton, chicken, fish tandoori is normally what we eat. Why not Turkey? Why ever not.

We usually eat anything tandoori with onions, the green mint and yogurt chutney, perhaps some naan / tandoori roti (normal fare at restaurants big and small. I have never been so intrepid as to try a tandoori all by myself. Timid Cook that I am).

But the Tandoori-Turkey-Kabob was served with roasted potatoes and sauteed red cabbage and kale seasoned with garam masala and deglazed with cider vinegar. And looked terrific too!!

Really enlivened my plain dal-chawal lunch.

Tuesday, September 26, 2006

Mustard Chicken

The last recipe I posted was three months ago. It has been an incredibly busy three months. Went for a long shoot at Wai village in Satara district, bang in the middle of monsoon, when the river Krishna was in spate. Had a quick holiday in Jakarta and enjoyed the cuisine as much as I could eat in the one week I was there. And only now, I have some breathing time. So here is another quick and easy chicken recipe, given to me by R.


You will need
500gm boneless chicken pieces
1 tsp dark vinegar
1 tsp white pepper powder
3 tbsp mustard oil
3 tbsp mustard paste
3 tbsp poppy seed paste (khus khus / posto)
3-5 green chillies
Salt to taste
¼ tsp sugar

How to
1. Wash and marinade the chicken pieces with a little salt, 1tsp
each of vinegar and white pepper powder for about an hour.
2. Heat mustard oil in a pan and add chicken pieces.
3. Fry till light brown.
4. Add 3tbsp each of mustard paste and poppy paste seed paste.
5. Add 3-5 slit green chillies, salt and a little sugar.
6. Add 1 cup water and reduce heat. Cover pan and cook till
tender.
7. Add more water if needed. Cook till gravy thickens.
8. Serve with rice.

Bon Appetit!

Sunday, June 25, 2006

Koi Macher jhol (Koi Fish Curry)

Koi Mach or Gangetic Koi is also known as Climbing Gouramie. It belongs to the perch family. (Perhaps the sporty cousin of the kissing gouramie??). This is one of my favorite fish dishes ever. And I have never cooked it myself. Never had to. Ma and K (our temepermental cook) have always obliged. K dictated this recipe to R who then emailed it to me. (Its a bit different from the other koi recipes available on the net, the most common being tel koi or koi in oil).

Koi is widely available. So do try this one. I guarantee that you won't be disappointed.

You will need:
Koi 1 kilo
Potato 1 large
Turmeric powder 1 heaped tsp
Cumin seed 1 tsp
Cumin powder 1 tsp (made into a paste with a little water)
Coriander powder 1& 1/2 tsp (made into a paste with a little water)
Bay Leaf 2
Ginger grated 1 tsp
Salt
Sugar
Water 2 cups
Coriander leaves
Oil for frying

How to:

1. Ask the fish seller to de-gill the fish. Smear salt on fish
and wash well.
2. Drain. Smear 2 tsp salt and 1 heaped tsp turmeric on the fillet
and set aside for 5 to 10 minutes.
3. Slice the potato lengthwise into sections.
4. In a wok / kadai heat 1/2 cup oil to smoking.
5. Medium fry the fish (if required in batches) and set aside.


6. In the same kadai, add the cumin seeds, bay leaves.
7. When the cumin seeds start crackling, add the potato sections
and stir.
8. Add 1tsp cumin paste, 1 tsp coriander paste, a little turmeric,
1 tsp ginger paste, a little salt and a pinch sugar.
9. Stir well and fry a bit.
10. Add the water.
11. After two minutes add the fried fish and cover.
12. Cook for 5-7 minutes or till potatoes have softened and fish
well soaked in gravy.
13. Add the coriander leaves remove from fire.
14. This curry has to be eaten with steamed rice (a must).

Note: K prefers to take cumin grains, grind them using a shil patha (a stone block with fine carvings to aid in the grinding. The spices are ground using another stone not unlike in shape to a rolling pin - also carved - but smaller). Same for coriander. I, on the other hand, would have little qualms of using powdered spices and making them into a paste with a few drops of water!

Monday, May 01, 2006

Moong sprout cutlets

R got this recipe from somewhere and passed it on to me. Quick and easy.

You will need:
Potatoes 2 cups boiled and mashed
Moong Sprouts 1 cup
Green chillies 3 finely chopped
Grated ginger 1 tsp
Garam Masala 1/2 tsp
Carrot 2 tbsp chopped
Bread 2 slices
Oil or ghee for frying
Salt to taste

How to:
1. Boil the carrot pieces and mash them gently.
2. Soak the bread slices in water and squeeze out the water.
3. Mix well the potatoes, carrots, bread slices, green chillies,
ginger, salt and garam masala.
4. Take lemon sized portions and shape into cutlets.
5. Press about a tablespoonful of sprouts on one side of the
cutlet.
6. Shallow fry on both sides using a little ghee.
7. Serve hot.

Tuesday, April 25, 2006

Aam Paana

I am EXCITED. I tried something new. And it turned out FINE.

I was out buying veggies on Sunday when on an impluse, I picked up two Green mangoes. Unripe that is. Rushed back home and rang my faithful R. I had a pencil and paper at hand. "Tell me how to make Aam pana".

She gave me the recipe in her style (which means some one who is not a timid cook and would immediately know all proportions and finer details). I had to ask her to repeat with exact measurements. That meant tsp, tbsp, minutes etc. I varied it a bit. Egad. If she reads this post, she might say, "That is not my Aam pana". In any case, it tasted really nice. Not at first though. It was yummy after I chilled it. Try it, its easy enough.

You will need:

(I used only two small mangoes. If you use more, you will, hopefully be able to increase other ingredients appropriately. I will, stick to two mangoes till I am perfectly sure about it)!
Green (unripe) mangoes 2
Cumin seeds 2 tbsp
Mint leaves 1 small bunch
Rock Salt 1 heaped tsp
Salt 1/4 tsp
Sugar 2-3 tbsp (you can can vary this. I used about 1 & 1/2 since A is not allowed sugar).

How to
1. Wash the mangoes well. Really scrub the skin.
2. Use a knife or a fork and slash / prick holes on to the skin of the mangoes.
3. Boil them in a pan with a little salt (about 1 tsp).
4. Plunge them in cold water to cool them and then peel them.
(This is a very messy process. But I guess practice makes perfect).
5. Dry roast the cumin seeds on a "tawa" or any pan (actually).
6. Coarsely grind them.
7. Mix the ground cumin seeds, rock salt, mint leaves, sugar, salt in a mixer / blender (I really don't know the difference between the two).
8. In a frying pan, add a tsp of oil.
9. Sprinkle some cumin seeds (about a pinch really), one red chillie (I used red chillie flakes), and then added the blended pulp.
10. Add about 2 cups of water (250 ml).
11. Cover and simmer for 10 minutes.
12. Adjust seasoning. Here you can make it more tangy, salty or sweet, according to your taste.
13. Strain (I did) all the pulp away and chilled the juice.
14. Actually, I put it in the freezer (don't quite know why) and had to thaw it (which i did by just letting it sit on the kitchen counter. Its really hot here, right now). But when it unfroze, it tasted really, really yum.

Usually, Aam pana is served as an apertif. But last night, we had it as Digestif and loved it.

The portions were really small: Half a glass each.

Saturday, April 22, 2006

2 recipes for Chocolate Mousse

Menu I never cooked

One Saturday last winter, A sprang a surprise on me by inviting a couple I had not yet met. Naturally, the first thing I did was to PANIC. And at once, shot off an email to R.

Me: Din-Din scheduled for Friday so hurry up with your suggested menu. OK???
R: Have loads of errands, studies and am again going early for practice session-will try to squeeze in a few doable recipes by your standards.

She had by next Friday, emailed me several easy (do-able by my standard recipes). And I knew she was terribly busy. And sadly, the dinner got cancelled and I never really had the chance to try out any of them. But perhaps, you can. Here they are bit by bit.

Recipe # 1
Eggless Chocolate Recipes

What you will need:
Milk 2 cups
Sugar 5tbsp
Gelatin 2tsp
Cornflour 1tbsp
Cocoa powder 3tbsp
Plain chocolate 40 gm(1 slab)
Coffee Powder 3/4 tsp
Vanilla Essence 1/2 tsp
Cream whipped till fluffy 3/4 cups(150gm)

How to:
1. Mix cocoa and cornflour in 1/4 cup milk in a small bowl.
2. Boil the rest of the milk with sugar in a heavy bottomed pan.
3. Add cocoa and cornflour paste to the boiling milk stirring continuously.
4. Add chocolate broken into pieces.
5. Cook on low heat for 3-4 minutes till chocolate dissolves.
6. Add coffee and remove from fire.
7. Put 1/4 cup water in a small pan.
8. Add gelatin(unflavoured),dissolve on low heat.
9. Mix gelatin solution with chocolate custard.
10. Chill in the freezer till a little thick but not set.
11. Beat this thickened chocolate custard.
12. Beat cream and essence till slightly thick and fluffy.
13. Add whipped cream to the chocolate mixture. Mix gently.
14. Transfer to a serving dish or pour in individual mould or glasses.
15. Refrigerate till set.
16. Decorate with whipped cream or add one dollop or spoonfull of cream on top if you don’t know decorating.

R: Its easy -try it-wont go wrong if you don’t mess up badly.
Me: Baby, is this easy?? Gelatin? Where do I get that frm?? I Meant easy by my standards, not yours. Give me vanilla icecream + fruits + something stuff. Also give me your easiest coffee (parina) recipe.

Reply : sent you some more recipes and don’t know why it didn’t reach you-am a bit busy-am trying to send-takes time to type out the recipes.

Recipe # 2
Quick and easy by baby standard chocolate mousse

What you will need
Dark chocolate 300 gms
Butter 2 tbsp
Fresh double cream 6 cups
Castor sugar 1/2 cup

How to
1. Break chocolate into small pieces ,transfer into a bowl and add butter.
2. To melt this mixture put some water in a bigger vessel and place bowl with chocolate in it and cook till it is smooth and even.
3. Remove from heat and allow it to cool.
4. Mix half of the cream into it.
5. Stiffly beat the remaining cream with sugar, fold this into the chocolate mixture and refrigerate for 30-40 min.
6. Take a piping bag with large star nozzle and pipe this chilled mousse into individual glass and refrigerate. You can also pour it instead of piping.
7. Serve chilled
R: Do this a day before your guests come- all sweetdishes are best done ahead.

To continue....

Saturday, April 15, 2006

2 Recipes for the New Year!

Today is Poila Boishak. Or the first day of the Boishak month which marks the Bengali new year. And so, can food be far behind? So here are not one, but two recipes -- both courtesy R. A mutton dish from Lucknow (or so the name suggests) and then for the sweetdish - Malpua. Both are not R's own. Definitely not the Malpua which happens to be a great favorite not only in Bengal but elsewhere in India as well.

Enjoy!! Have a great year ahead.

Lucknavi Ghosht kaa achar
(Loosely translated it means Mutton Pickle from Lucknow...although its not a pickle).

You will need:
Mutton Half kilo
Ginger garlic paste 1 tbsp
Red chilli powder 1 tsp
Turmeric 1 tsp
Dried red chillies 2-3
Khaskhas (Poppy seeds) 1 tbsp
Cloves 4-5
Cardamom 3
Aniseed(saunf) 1 tsp
Cinnamon 1 stick
Sesame seeds 1 tsp
Corainder seeds 1 tsp
Sugar 1 tsp
Salt to taste

How to:
1. Marinate the mutton in ginger garlic paste,salt and sugar for
an hour.
2. Dry roast the poppy seeds,cloves,cardamom,aniseeds and cinnamon.
3. Grind these to a paste.
4. Heat oil in a pressure cooker. Add the whole red chilli.
5. Add the meat and the ground spices,turmeric powder,red chilli
powder.
6. Pressure cook the meat in 1 cup of water(for about 6-7
whistles).
7. Open the lid of the pressure cooker and simmer till liquid
evaporates and dish is dry.
8. Keep stirring to prevent from burning.
8. Sprinkle with sesame seeds and whole corainder seeds.
9. Serve hot with parathas or rotis.

Malpua

You will need:
Milk 1 1/2 litres or 7 cups
Khoya or Mawa grated 50 gms
Green cardamoms 3
Refined flour 3 tbsp
Ghee to deep fry or white oil will do
For sugar syrup
Sugar 2cups
Natural yellow colour (optional) 1/4 tsp
For garnish
Pistachios 15-20
Saffron a few strands

How to:
1. Boil milk in a thick heavy bottomed pan, reduce heat and simmer
till it is reduced and reaches a coating consistency.
2. Add grated khoya and mix well.
3. Allow it to cool to room temperature.
4. Reserve 2 tbsp of sugar and form sugar syrup with the rest of
the sugar and two cups of water.
5. Dissolve saffron in 2tbsp of hot milk.Add it to the sugar
syrup. Chop pistachios finely.
6. Add refined flour and reserved sugar to the reduced milk. Mix
well and make a batter of pouring consistency using a little
milk if required.
7. Heat sufficient ghee in a wide mouthed flat bottomed kadai.Pour
a ladleful of batter to form a small pancake.
8. Cook on low to medium heat.
9. Turn it over when it starts to change colour slightly. When
both sides are done, drain and immerse in sugar syrup.
10.Sprinkle chopped pistachios and remaining saffron on malpuas.
11. Reapeat till all the batter is used up.
12. Serve hot.

Bon Appetit!

Tuesday, April 11, 2006

Aunty's Cauliflower Recipe

(I can't think of any other name)

Soon after we had moved into our own place in Calcutta, our neighbours came over and brought with them a plate of this wonderful dish. All of us relished it and R, went over and got the recipe from the lady next door and so happily, not only did we only got to taste it from time to time, the "lady" next door became our dear aunty. So here goes:

You will need:
1 large cauliflower
1 tsp ginger paste
4 tsp garlic paste
3 medium onion
4 tbsp white vinegar **
2 tsp sugar
salt to taste
2-3 green chillie paste
3 tbsp oil
1&1/2 cup water

How to:

1. Cut the cauliflower into biggish florets.
2. Pierce the thick stem portion to facilitate easy seepage.
3. Place in a bowl, the ginger, garlic, onion juice (reserve the pulp), sugar, salt to taste, and vinegar. Marinade the cauliflower florets for 1 to 1&1/2 hours.
4. Turn the florets from time to time so that they soak up the marinade evenly.
5. Heat 2-3 tbsp oil in a wok or kadai.
6. Add the reserved onion pulp and fry till light brown.
7. Add the cauliflower and not the marinade and fry for 6-7 minutes.
8. Take a pressure pan or cooker, add 1 and half cups water, cauliflower, the marinade and cook till done. 1 whistle should do-if not two whistles.

Bon Appetit!

** (In my blissful ignorance before my entry into cooking, vinegar to me meant - white or red. Simple. This basic simplicity turned my first shopping venture into a nightmare. At the supermarche - I was faced with rows and rows of vinegars in all sorts of colour and ingredients. God. What do I do??? Give me my simple white or red vinegar back and now). I am wiser now. But since this recipe has been provided by R and she has not mentioned the exact type of vinegar, I am putting it down the way she has and yet I hesitate).

Saturday, April 08, 2006

Quick Rice Pakodas

Work has been punishing. And not only has my blogging suffered, but everything around me. Its like I live at office and go home for a few hours. Well, here is a recipe thats just the thing for a hurried and harried schedule. One of R's. And what's more she says, it make a perfect quick and tasty snack when guests arrive and you are not prepared. Quick Rice Pakoda! And since I swear by her culinary skills, sense and advice, she mut be correct!

You will need:
4 tbsp cooked rice (leftover would do)
1 large onion finely chopped
3 green chillies finely chopped (optional)
1 small bunch coriander leaves finely chopped
1 egg
oil for deep frying
salt to taste

How to:
1. Mash the rice and mix it with the other ingredients.
2. Shape into oblong balls and deep fry till light brown.
3. Serve hot with tomato ketchup (or any other chutney or sauce of your preference).
4. Viola!

Sunday, March 12, 2006

Kadai Murgh Afghani

I have always loved cook books. Almost all of R's cook books have been gifted by me. Doesn;t matter if I tried out recipes from them. I just love going through the recipes. Infact, there was a time when I couldn't sit through lunch and dinner without leafing through one. (OK, weird, I know). And the exotic recipes more than made up for the simple daily fare that I happened to be eating. Actually daily fare plus exotic recipes from cook books was the ideal combo for me. I don't have those books here with me. They are with R. But ocassionally on a weekend, I look up a food blog...but its not quite the same.

What with the avian flu scare and chicken being a big no-no, I asked R for her Aaghan chicken recipe (she got that out of a book and then added her own twist)...to read through while I ate decidely vegetarian meal. So here it is:

Kadai Murgh Afghani
(Can't vouch for it to be authentic afghani but its very tasty and looks great too).

You will need:
Chicken 1 kg
Cooking oil 6tbs
Garlic paste 3½ tsp
Whole red chillies 5-6
Coriander seeds 3tsp
Tomatoes chopped 4 ½ cups
Green chillies chpped 3-4
Ginger chopped 5tsp
Corainder leaves chopped 5tbp
Garam masala 2tsp
Fenugreek or methi powder 1tsp
Salt 2tsp

How to:
1. Clean and cut chicken into medium sized pieces.
2. Pound red chillies and corainder seeds into a paste.
3. Heat oil in a Kadai and add garlic paste and saute over medium flame till light brown.
4. Add red chillie-coriander paste, followed by tomatoes and bring to a boil.
5. Add green chillies, ¾ of the ginger and 1/3 of chopped coriander, reduce heat and simmer for 4-5 minutes.
6.Add chicken and bring to boil.
7. Reduce heat to allow gravy to simmer,stirring occasionally until oil separates from masala and the gravy becomes thick and chicken tender(approx 15 min or so).
8. Sprinkle garam masala and methi powder, stir for two minutes. Adjust seasoning.
9. Pour the chicken into a dish and garnish with leftover ginger and coriander.
10. Serve with rice or rotis.

Bon Appetit!

Sunday, March 05, 2006

Dal with Radhuni

Here I am, after an enormously exhausting week. I worked late everynight and returned home at 4.30am on Thursday. I was alone today and (A having gone to his parents for weekend) and so instead of eating out (which I do when I am alone), I rustled up a simple bengali meal. Aloo posto, Radhuni dal and rice. And savored every bit of it. So for Weekend Herb Blogging, at Kalyn's Kitchen here is the recipe forDal with Radhuni

Radhuni is a herb used (to my knowledge) by bengalis mostly. I looked up the net to find out more about it (for the benefit of non-bengali readers of my post) and to my surprise found radhuni is the seed of celery! Perhaps my knowledge is scant, but I can think of only a very few dish that requires the tiny dark grains of radhuni. And yet, these dishes cant be cooked without radhuni. There is simply no substitute for it! It looks a lot like "ajwain" or Carum / Carom. But that's where the similarity ends. It has a very distinct flavour. And only a pinch is required, otherwise, it could overpower the dish!

(For Two)
You will need:
1 small cup of masoor dal (Marc has explained dals very well here)
1/2 tsp radhuni / celery seeds
salt to taste
1 tsp oil for tempering
green chillies optional
1/2 l water

How to
1. Pressure cook / boil the masoor dal with 1/2 tsp turmeric and salt. Reserve.

2. In a kadai / wok, heat 1 tsp oil.

3. Add the radhuni seeds.

4. When they crackle, add the dal.

5. Add water if dal is too thick or cook on high flame to reduce if too watery.

6. Adjust salt.

7. Eat with rice and veggies of your choice!

Bon Apetit!!

Saturday, February 25, 2006

Rohu and cauliflower curry

This isn't an original recipe. Its a staple Bengali dish. But it is one of my favorites. I checked up the net to get some background on Rohu (Rui in bengali) and to my amazement found a link from Wikipedia which stated that its popular in Punjab. Good for them. Just as well. What with the Avian Bird Flu, perhaps its safer than Butter Chicken?!

Here it is then: Rui machcher phulcopi diye jhole: Rohu and cauliflower curry

You will need:
6 pieces of Rui fish
1 small cauliflower
4 small or 2 medium Potatoes
1/2 tsp cumin seed
1 tsp cumin Powder
2 tsp coriander powder
3/4 tsp turmeric for the curry "jhole" &
about 2 tsp to coat the fish before frying them
6 tbsp oil for frying the fish
2 tbsp for the Curry
Water for the curry

How to:
1. Wash the pieces, drain / pat dry. Sprinkle liberally with salt and turmeric and mix well (with hands). Careful....turmeric so does stain the fingers and nails.
2. Heat oil in a kadai / wok till it smokes. (It must smoke otherwise the fish pieces will stick to the pan and you will end up with scrambled fish).
3. Add the pieces into the oil a few at a time in batches. Now, some people prefer it lightly fried, I prefer it deep fried (till the fish turn brown...unhealthy but like all things unhealthy, very tasty)!
4. Slice the cauliflower into biggish florets, wash, drain and then parboil them with a little salt. Drain and set aside.
5. Cut the potatoes into largish cubes. Wash well and drain.
6. Heat oil in a kadai. Add cumin seeds. When they crackle, add the cubed potatoes. Fry for a while.
7. Add the cumin, coriander & turmeric powders. Season with salt.
(R taught me this - Add 2-3 tbsp water and fry the masalas on high heat. Repeat this proces couple of time. This helps to fry the masals well. Only then proceed to step 8).
8. Add Water. Here you aer adding water to make the curry About 1 large cup (specifically, 1/4 l). Cover and lower flame.
9. When the potatoes are nearly boiled, the water reduced, add the cauliflowers, the fish and 3-4 slit green chillies (can do without if you don't like them...but it does add a lovely flavour). Adjust the water for the curry...you might have to add some more. This is after all a curry.
10. Add a pinch of sugar (to even out the flavour).
11. Cook over high flame for 5 minutes.
12. Serve with steamed rice!

Notes:
1. The correct procedure would be to fry the cauliflower florets separately (instead of parboiling them in step 4) and then add them in step 9. This is a latter day, attempting-to-be-healthy-variation. Both taste equally good.
2. Parwal / Potol can be used instead of cauliflowers. They will have to be fried and not parboiled!

Sunday, February 19, 2006

Weekend Herb Blogging : Methi Chicken

First time, I managed to catch Kalyn's Weekend Herb Blogging.

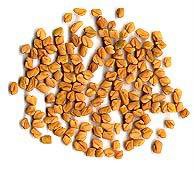
Fenugreek. We call it methi and use the leaves fresh or dried or even the yellow grains. Widely used all over the world (or so it seems See Gernot Katzer's Spice Pages ), it is supposed to have a host of medicinal properties including a must for diabetics. Read more here.

That apart, it has a very distinct flavour. To the simple chicken curry, add methi and viola! A new dish entirely (whereas really, it was just a teeny tiny variation). Makes a great dish to serve at dinners (and yet is so easy to make, that it almost feels like cheating)!

This recipe was given to me by R. It was slightly more intricate. But I changed some of the steps (easier for me to remember) and to my delight, I found it tasted the same!

You will need
1 kg chicken cut into pieces
3 bunch methi leaves
3 bunch coriander leaves
3 green chillies (optional)
2 medium or 1 large onion
6 garlic pods
2 tomatoes coarsely chopped
1 tsp sugar
salt to taste

How to:
1. Wash the chicken pieces and pat dry.
2. Chop the coriander and methi leaves and grind into a paste with the chillies (if using).
3. Marinade the chicken pieces with the methi-coriander marinade for a couple of hours. ( I cheat….and don’t really marinade for couple of hours)!
4. Slice the onions finely. Grate the garlic.
5. Heat 3-4 tbsp oil in a kadai / wok.
6. Add the sliced onions and grated garlic till the onions are pink and translucent. (Sprinkle half a tsp of salt. This helps to fry the onions faster).
7. Add the chicken pieces (and not the marinade) and stir so that all the pieces are fried properly.
8. Add the chopped tomatoes.
9. Fry till the tomatoes softens and the juices come out of it.
10. Add the marinade and and stir to mix well.
11. Cover, lower gas and cook till done. If you are using a pressure cooker, the till one whistle.

Serve with rotis or rice!

Bon appetit!

Note: Methi is slightly bitter to taste and therefore, do add the coriander with it. If you are using dried methi leaves, then halve the quantity.